
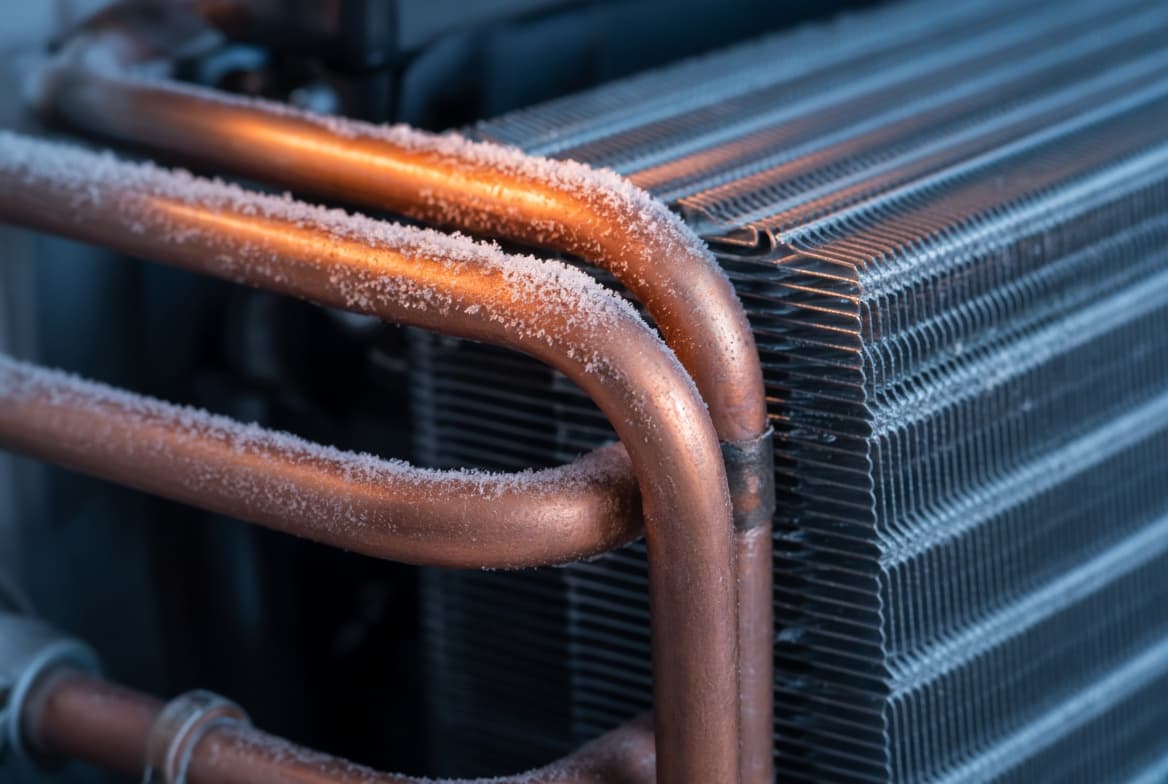
The evaporator coil is the indoor half of your air conditioner or heat pump: a block of refrigerant tubing and thin aluminum fins that sits on top of your furnace or inside your air handler and pulls heat and moisture out of the air blowing across it. A dirty coil weakens cooling and can freeze. A leaking coil loses refrigerant, and the fix becomes a choice between a leak repair, a new coil, or a new system.
What Is an Evaporator Coil?
A central air system has two coils. The condenser coil wraps around the outdoor AC condenser and releases heat outside. The evaporator coil sits indoors in the airstream and absorbs that heat in the first place. You will also hear it called the AC coil, indoor coil, A-coil, or cooling coil.
It is copper or aluminum tubing woven through closely spaced aluminum fins, with a metering device at the inlet (a fixed piston or a thermostatic expansion valve, TXV) and a drain pan underneath.
Where Is the Evaporator Coil Located?
| Your setup | Where the coil is | What it looks like |
|---|---|---|
| Upflow furnace with central AC | In a sheet metal box on top of the furnace, under the supply duct | A cased A-coil: two slanted slabs forming an A over a drain pan |
| Horizontal furnace in an attic or crawlspace | Attached to the furnace outlet, in line with the duct | A cased horizontal or slab coil with a long side pan |
| Downflow furnace | Under the furnace, above the supply duct | A cased coil set up for downflow |
| Older or tight installs | Inside the existing plenum with no case of its own | An uncased coil in site-built sheet metal |
| Heat pump or all-electric home | Inside the air handler cabinet, usually below or beside the blower | A slab or A-coil built into the unit |
With a furnace, look for the box where the two copper refrigerant lines enter. With an air handler, the coil is behind an access panel in the cabinet.
How an Evaporator Coil Works
Refrigerant arrives from outside as a warm, high-pressure liquid. The metering device drops its pressure and its boiling point to roughly the 40s Fahrenheit, so it boils as the blower pushes warmer room air across the fins, absorbing heat. The cooled air moves on, and the refrigerant returns to the compressor as vapor through the larger insulated line.
The coil also dehumidifies. Its surface runs below the dew point, so moisture condenses on the fins and drips into the pan. A clogged drain or failed pan then shows up as AC leaking water inside. On a heat pump the flow reverses in winter and the same coil gives off heat. For the full refrigeration loop, see how air conditioning works.
Signs of a Bad or Failing Evaporator Coil
- Weak cooling, long run times, or weak airflow at the registers.
- A frozen coil, often spotted as ice on the large copper line.
- Water or a musty smell, from meltwater overrunning the pan or biofilm on a dirty coil.
- Hissing near the indoor unit or oily residue on the coil or fittings. Refrigerant carries compressor oil, so an oily stain marks a leak.
- Needing refrigerant more than once. A sealed system does not use refrigerant up. If it needs a charge every season, it is leaking, and the indoor coil is a common culprit. See how AC refrigerant leaks are found and fixed.
Formicary corrosion: why copper coils leak from the inside
Many coil leaks come from formicary corrosion, sometimes called ant's nest corrosion. Organic acids form when moisture meets vapors from cleaning products, adhesives, new cabinetry and flooring, paint, and air fresheners. They eat microscopic branching tunnels through copper tube walls, so a coil can look perfect while leaking through pinholes too small to see.
That is why a five-year-old coil can leak, why a patched copper coil often leaks again nearby, and why many manufacturers moved to all-aluminum tubing, which resists this corrosion. After a corrosion leak, ask for an aluminum replacement and keep solvent-heavy products away from the return grille and equipment closet.
Dirty Coil vs Leaking Coil: How to Tell
Both cut cooling and both can freeze the coil, so separate them before anyone sells you a coil.
| Clue | Points to a dirty coil | Points to a refrigerant leak |
|---|---|---|
| Airflow at the registers | Weak, even with a clean filter | Normal |
| Return air temperature minus supply air temperature | Often larger than normal: less air, but colder | Often smaller than normal: plenty of air, only cool |
| Where ice forms | Across the whole coil, often with a loaded filter | Often starting near the coil inlet or on the suction line |
| Smell or sound | Musty odor at the vents | Hissing or gurgling at the indoor unit |
| What you can see | Gray felt of dust, pet hair, or slime on the entering face | Oily residue on tubing, bends, or fittings |
| What confirms it | Static pressure drop across the coil, or a look at the entering face | Electronic leak detector, bubble test, or nitrogen pressure test |
You can run the temperature check yourself: after 15 minutes of cooling, compare a probe thermometer at a return grille and at a nearby supply register. Most systems show a drop of roughly 15 to 20 degrees Fahrenheit in normal humidity. Treat it as a screen, not a diagnosis.
Before blaming the coil, replace the filter, open every register, clear the return grilles, and confirm the outdoor unit runs. Plenty of "bad coils" turn out to be a clogged filter. If cooling is still poor, work through AC not cooling or blowing warm air.
How to Clean an Evaporator Coil
Cleaning fixes a dirty coil. It does nothing for a leak.
What you can and cannot reach
Dirt builds up on the side air enters, which is rarely the side you see. On an upflow A-coil, air enters inside the A and leaves through the outer faces, so the outer faces can look clean while the inner faces are matted solid. Many cased coils also have a front panel sealed with foil tape, sometimes with the refrigerant lines passing through it.
You can usually clean a coil whose entering face is visible through an access panel, common on air handler slab coils. Leave to a technician: pulling a coil from its case (a kinked refrigerant line becomes a refrigerant repair), removing a panel the lines pass through, and anything touching the refrigerant circuit, which legally requires EPA Section 608 certification.
Cleaning an accessible coil
- Turn the system off at the thermostat and at the breaker. Air handlers often run on 240-volt circuits, and blower capacitors can hold a charge after the power is off, so keep your hands out of the blower and control compartments.
- Remove the coil access panel.
- Vacuum loose dust with a soft brush attachment, brushing along the fins, never across them.
- Spray a no-rinse foaming coil cleaner made for indoor coils over the entering face. It lifts dirt and drains away with the condensate once the system runs. Skip household degreasers, bleach, and acid condenser cleaners.
- Confirm the drain pan and condensate line flow freely, since the cleaner and dirt leave that way.
- Reseal the panel with foil HVAC tape, restore power, and run cooling.
Never use a pressure washer or stiff brush on the fins.
When the coil needs a professional
Call a technician when the entering face is matted or out of reach, when there is heavy slime, or when the coil iced up for no obvious reason. In humid climates, a coil-facing UV light for HVAC can slow regrowth, though it won't remove dirt. The same visit should check airflow and charge. Coil inspection belongs in routine AC maintenance.
Leaking Coil: Repair, Replace the Coil, or Replace the System?
Repair the leak. A technician can braze a single, accessible leak, such as a cracked return bend. It makes less sense for corrosion pinholes, since more usually follow. Many manufacturers discourage leak-sealant additives, which can affect metering devices and warranty coverage.
Replace the coil only. This keeps your outdoor unit and furnace or air handler. It fits when the outdoor unit is healthy, uses a current refrigerant, and has years left.
Replace the outdoor unit and coil together. The better buy when the equipment is old, uses R-22, or the compressor is also failing.
What the coil warranty covers
Most coils carry a manufacturer parts warranty, often longer if the equipment was registered on time. It usually covers the coil and nothing else: you still pay for labor, refrigerant, a filter drier, and any sheet metal work. Labor is a large share of a coil job, so a warranty coil lowers the bill without making it cheap. Check for a separate installer labor warranty or a home warranty plan.
Refrigerant type and matched-system ratings
A replacement coil must be built for your refrigerant and listed as a match for your outdoor unit. Manufacturers certify indoor and outdoor pairings through AHRI, and your SEER2 rating applies only to that combination. A mismatched coil can lower efficiency, cause icing or poor dehumidification, and complicate warranty claims. Ask for the AHRI reference number and look it up in the AHRI directory.
Under the EPA's refrigerant transition, new residential systems use lower-impact refrigerants such as R-454B and R-32, and their coils typically include a leak sensor. Replacing a coil to repair an existing R-410A system is generally treated as a service repair; replacing both indoor and outdoor sides at once generally counts as a new system. The rules have shifted more than once, so have the contractor confirm what applies.
R-22 systems
Production and import of R-22 refrigerant ended in 2020, so service depends on reclaimed supply and stays expensive. New R-22 systems stopped being made around 2010, so any R-22 system is old. A leaking coil on one is almost always the signal to replace the system.
Decision framework
| Your situation | Usually the better move |
|---|---|
| Under about 10 years old, coil under warranty, R-410A or newer | Replace the coil under warranty; pay labor and refrigerant |
| Single accessible leak on an otherwise clean coil | Braze repair, confirmed with a pressure test and proper evacuation |
| Second leak on a copper coil, or confirmed formicary corrosion | Replace the coil, ideally with aluminum tubing |
| 12 to 15 years or older, coil out of warranty | Price the coil against a new matched outdoor unit and coil |
| R-22 system with a leaking coil | Replace the outdoor unit and coil together |
| Compressor also failing | Replace the system |
Evaporator Coil Replacement Cost: What Drives the Price
Most published cost guides put an out-of-warranty evaporator coil replacement for a typical home around $600 to $2,500 installed, with the coil itself commonly around $500 to $1,100 of that depending on size. Larger systems, attic installs, sheet metal work, and full refrigerant charges push jobs to the top of that range or past it; at least one manufacturer's guide puts many jobs well above $2,000. For other parts, see AC repair cost by part.
What moves the number:
- Size. A 5-ton coil costs more than a 2-ton coil and holds more refrigerant.
- Style and fit. Uncased coils cost less but need site-built sheet metal, and a coil with different dimensions needs a new transition.
- Metering device. A new TXV or a different piston size adds parts.
- Refrigerant. Recovery plus a new charge is a real line item, and R-22 costs the most.
- Access. Hot attics, crawlspaces, and tight closets add hours.
- Doing it right. A filter drier, nitrogen while brazing, a deep evacuation, and a permit where required are part of a proper job.
- Warranty status. A warranty coil removes the part cost, not the rest.
What to Ask a Contractor Before Approving a New Coil
- How did you confirm the leak is in the coil, and can you show me where?
- Is the new coil an AHRI-listed match for my outdoor unit, and what is the reference number?
- Is it copper or aluminum tubing?
- Does the quote include recovery, a filter drier, nitrogen while brazing, and evacuation to a measured micron level?
- What does my parts warranty cover, and do you warranty the labor?
- What would a matched outdoor unit and coil cost by comparison?
Frequently Asked Questions
What happens when an evaporator coil goes bad?
A dirty coil chokes airflow, so you get weak air, higher bills, and eventually a frozen coil. A leaking coil loses refrigerant, so the system runs long and blows air that is cool but not cold. Either way the compressor works harder than it should, and a leak left alone can damage it.
How long do evaporator coils last?
Manufacturers commonly cite 10 to 15 years. A coil kept clean with regular filter changes can last as long as the rest of the system, while copper coils exposed to household chemical vapors can fail much sooner from formicary corrosion.
Is it worth replacing an evaporator coil?
Usually yes when the system is under about 10 years old, the coil is under its parts warranty, and the outdoor unit is healthy and uses a current refrigerant. Usually no on an R-22 system or equipment past roughly 12 to 15 years, where the money goes further toward a new matched coil and outdoor unit.
Can I clean my evaporator coil myself?
You can clean the surface you can safely reach, with the power off and a no-rinse foaming coil cleaner. On many cased A-coils the dirty entering face is inside the A behind a sealed panel, so a heavily matted coil usually needs a technician.
What causes evaporator coils to leak?
The most common causes are formicary corrosion (pinholes in copper tubing from acids formed by household chemical vapors), vibration wearing through tubing at a support, cracked braze joints at the return bends, and long-term corrosion from condensate. Damage during service or chipping at a frozen coil also causes leaks.
Do I have to replace the indoor coil and outdoor unit at the same time?
Not always. A new coil can go on a healthy outdoor unit if it is a listed match and uses the same refrigerant. Replacing both together is the better choice when the outdoor unit is old, uses R-22, or is near the end of its life.